
Creating adorable plush toy characters with AI image or 3D generation tools has become extremely popular for branding, social media content, children’s illustrations, and product mockups. The prompt you provided is designed to produce ultra-cute, professional-quality plush toy renders that look soft, cozy, and realistic.
This guide explains how to use the prompt effectively, customize it, and achieve consistent high-quality results.
Prompt:
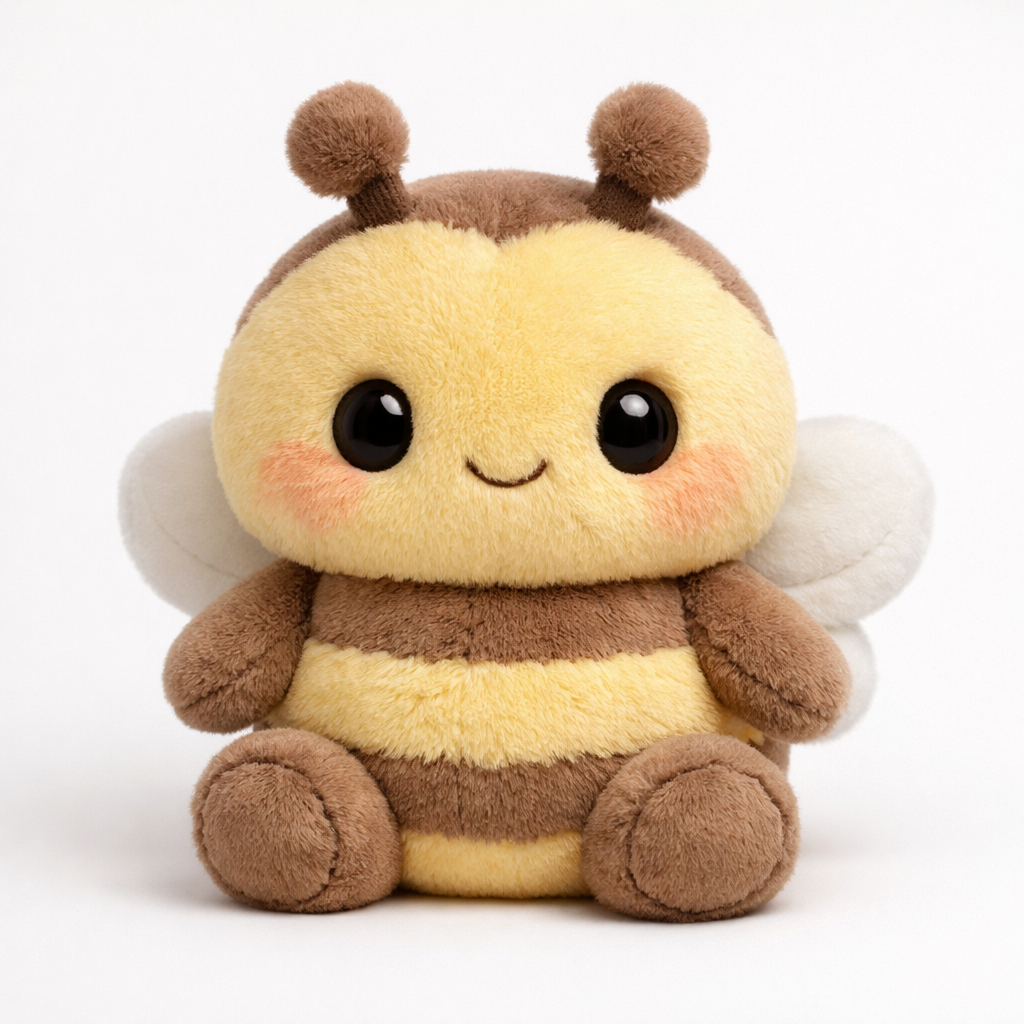
Create a hyper-realistic 3D render of a character as an ultra-cute, soft plush toy designed to resemble a huggable children’s stuffed animal. The character should have a round, chubby body with fluffy, smooth fur or fabric texture, expressing warmth, innocence, and friendliness. Use soft, even studio lighting to enhance the cozy plush texture, and place the toy on a clean white or minimal background for a modern, professional look. Keep the color palette soft, sweet, and slightly muted to create a gentle, dreamy atmosphere. Ensure hyper-detailed materials while maintaining a soft, toy-like aesthetic, focusing on maximum cuteness and premium plush realism. Add subtle shadows and realistic fabric stitching details to increase depth and authenticity.
1. What This Prompt Is Designed to Do
The prompt aims to generate:
• A hyper-realistic 3D plush toy
• A soft, cute, child-friendly stuffed animal style
• Professional studio lighting
• Soft textures and materials
• Minimal background for product-style presentation
• Premium toy realism with stitching and fabric details
In simple terms, it transforms any character into a huggable plush toy version.
2. Understanding the Prompt Structure
Let’s break the prompt into its main parts.
A. Main Concept
Create a hyper-realistic 3D render of a character as an ultra-cute, soft plush toy…
This tells the AI to:
- Use 3D rendering style
- Keep realism high
- Make the character plush and soft
B. Character Transformation
designed to resemble a huggable children’s stuffed animal…
This ensures:
- Round shapes
- Cute proportions
- Friendly appearance
- Toy-like softness
C. Texture & Material
fluffy, smooth fur or fabric texture…
This defines:
- Plush surface
- Soft materials
- Realistic fabric feel
D. Lighting Setup
soft, even studio lighting…
This improves:
- Texture visibility
- Soft shadows
- Cozy atmosphere
- Professional look
E. Background Style
clean white or minimal background…
Perfect for:
- Product previews
- Social media posts
- Branding visuals
- Marketplace mockups
F. Color Mood
soft, sweet, slightly muted colors…
This creates:
- Gentle mood
- Dreamy appearance
- Child-friendly tones
G. Realism Enhancements
stitching details, subtle shadows…
These small details make the toy feel real and premium.
3. How to Use the Prompt Step-by-Step
Step 1 — Choose Your Character
You must define what character becomes a plush toy:
Examples:
- Cartoon mascot
- Animal character
- Game character
- Logo mascot
- Original character
- Fantasy creature
Example:
a baby dragon character
a kawaii astronaut
a smiling panda mascot
Step 2 — Insert Character Into Prompt
Replace:
“a character”
with your subject.
Example:
Create a hyper-realistic 3D render of a baby dragon character as an ultra-cute plush toy…
Step 3 — Add Style Variations (Optional)
You can enhance the prompt by adding:
• Outfit details
• Accessories
• Pose
• Theme
Example additions:
- holding a small pillow
- wearing a hoodie
- sitting pose
- holiday theme
- space suit
Step 4 — Generate Image
Use the prompt in:
- AI image generators
- 3D render tools
- AI art platforms
- text-to-image systems
4. Best Use Cases
This prompt works well for:
Branding Mascots
Turn logos into plush mascots.
Kids Content
Perfect for storybooks or animations.
Merchandising Ideas
Great for toy concepts and product previews.
Social Media Content
Cute visuals attract attention quickly.
Game Character Merch
Convert characters into toy collectibles.
5. Pro Tips for Better Results
Tip 1: Add Pose Instructions
Example:
- sitting down
- waving
- holding heart
- sleeping pose
Tip 2: Control Fur Type
Examples:
- velvet fabric texture
- wool plush
- short smooth fur
- long fluffy fur
Tip 3: Add Emotion
Examples:
- smiling
- sleepy eyes
- surprised expression
- joyful face
Tip 4: Adjust Lighting Mood
Examples:
- warm cozy lighting
- soft pastel lighting
- sunrise tone
- dreamy glow
Tip 5: Specify Camera Angle
Examples:
- front view
- slightly angled
- product showcase angle
- toy catalog style
6. Example Optimized Prompt
Here is an upgraded example:
Create a hyper-realistic 3D render of a smiling baby panda character as an ultra-cute, soft plush toy designed as a huggable children’s stuffed animal. The toy has a round, chubby body with fluffy velvet fabric texture, big shiny embroidered eyes, and a friendly expression. Use soft studio lighting to enhance plush softness, place the toy on a clean minimal white background, and use soft pastel colors for a dreamy atmosphere. Include realistic stitching details, gentle shadows, and premium plush material realism. The toy is sitting while holding a small heart pillow to maximize cuteness.
7. Common Mistakes to Avoid
Avoid prompts that:
• Make characters too realistic or scary
• Use harsh lighting
• Use complex backgrounds
• Add too many colors
• Remove softness or plush look
Keep it cute, soft, and simple.
8. Final Thoughts
This plush toy prompt is powerful because it combines:
✔ Cute character design
✔ Realistic materials
✔ Professional product presentation
✔ Soft emotional appeal
It works beautifully for creators, marketers, designers, and social media creators who want adorable, professional visuals.

Leave a Reply