
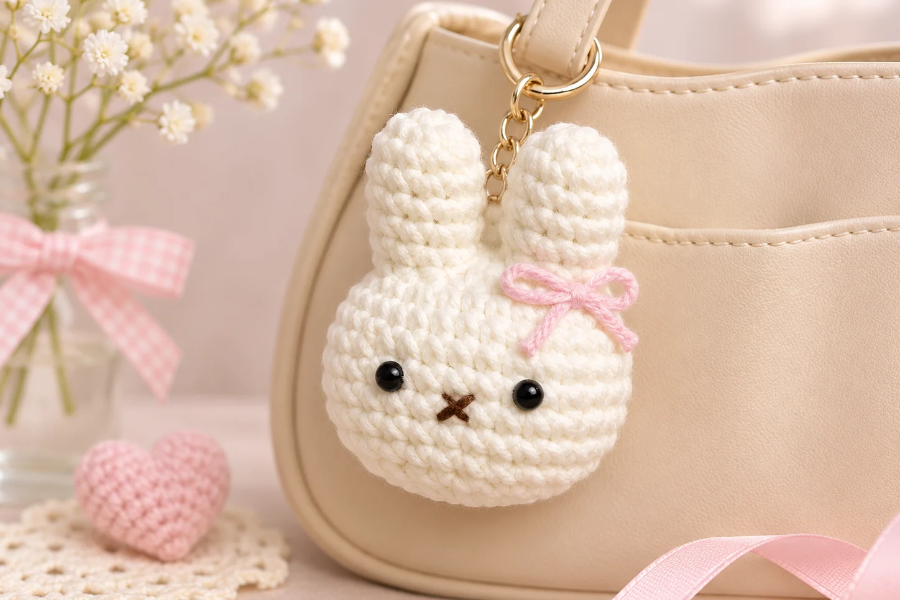
Looking for a cute and easy crochet project? This crochet bunny keychain tutorial will show you how to make an adorable mini bunny with long ears, a round head, and a sweet embroidered face. This small amigurumi bunny is perfect for decorating handbags, backpacks, or keys. It also makes a lovely handmade gift for friends and family.
Whether you’re new to amigurumi or already enjoy making crochet accessories, follow this step-by-step guide to create your own DIY crochet bunny keychain.
Materials Needed for a Crochet Bunny Keychain
Before starting, gather the following supplies:
- Yarn in your favorite bunny color
- Crochet hook suitable for your yarn
- Brown yarn for embroidering the eyes and mouth
- Stitch marker
- Scissors
- Yarn or darning needle
- Fiberfill stuffing
- Keychain ring or clip
- Small decorative ribbon (optional)
Crochet Abbreviations
| Abbreviation | Meaning |
|---|---|
| MR | Magic Ring |
| SC | Single Crochet |
| INC | Increase (2 SC in one stitch) |
| DEC | Decrease (2 stitches together) |
| SL ST | Slip Stitch |
| CH | Chain |
| ST | Stitch |
This crochet bunny pattern is worked mostly in continuous rounds. Use a stitch marker to keep track of the beginning of each round.
How to Crochet a Bunny Keychain Step by Step:
Step 1: Crochet the First Bunny Ear
Start by creating a magic ring.
Round 1: Make 5 single crochets into the magic ring. Pull the yarn tail to close the center. (5 stitches)
Round 2: Work an increase in every stitch around. (10 stitches)
Round 3: Make 1 single crochet in each stitch. (10 stitches)
Rounds 4–7: Repeat Round 3, making 10 single crochets in each round.
Before starting Round 4, turn your work inside out so the right side faces outward.
After completing Round 7, make a slip stitch into the first stitch. Chain 1, cut the yarn, and pull the tail through to fasten off.
You now have your first bunny ear!
Step 2: Crochet the Second Bunny Ear
Repeat the same instructions from Step 1 to make another ear.
However, do not cut the yarn after finishing the second ear. You will use this working yarn to connect both ears and continue crocheting the bunny’s head.
Make sure both ears have the same number of stitches and are approximately the same size.
Step 3: Join the Bunny Ears
With the working yarn attached to the second ear, insert your hook into the slip-stitch area of the first ear and make a single crochet to join them.
Place your stitch marker in this first stitch.
Now begin shaping the bunny’s head.
Head Round 1:
- Make 1 decrease followed by 2 single crochets.
- Repeat this sequence 4 times.
- Work another decrease and finish with 1 single crochet.
You should have 15 stitches at the end of this round.
When decreasing between the two ears, carefully work through the appropriate stitches to avoid leaving a large gap.
Step 4: Crochet the Bunny’s Head
After joining the ears, continue working in rounds.
Round 2: Make an increase in every stitch. (30 stitches)
Rounds 3–8: Make 1 single crochet in each stitch around. (30 stitches per round)
These rounds create the rounded shape of the bunny’s head.
Keep your stitches even and avoid pulling your yarn too tightly.
Step 5: Shape the Bottom of the Head
Now gradually decrease the stitches to close the bunny’s head.
Round 9: Work 3 SC, DEC, then repeat (4 SC, DEC) four times, and finish with 1 SC. (25 stitches)
Round 10: Repeat (DEC, 3 SC) five times. (20 stitches)
Round 11: Work 1 SC, then repeat (DEC, 2 SC) four times, followed by DEC and 1 SC. (15 stitches)
These decreases help create a smooth, rounded amigurumi bunny head.
Step 6: Stuff the Bunny
Before closing the head, add fiberfill stuffing.
Start by gently inserting stuffing into both bunny ears. You can use the back of your crochet hook to push the stuffing into the narrow spaces.
Next, fill the head with enough stuffing to maintain its round shape.
Avoid overstuffing, as this can stretch the stitches and create visible gaps.
Step 7: Close the Bunny’s Head
Continue decreasing to finish the shape.
Round 12: Repeat (DEC, 1 SC) five times. (10 stitches)
Round 13: Make 5 decreases. (5 stitches)
Cut the yarn, leaving a tail long enough for sewing.
Thread the yarn tail through your darning needle and pass it through the front loops of the remaining five stitches.
Gently pull the yarn to close the opening.
Secure the yarn, weave the excess tail inside the head, and trim it.
Your mini crochet bunny shape is now complete!
Step 8: Embroider the Bunny’s Eyes and Mouth
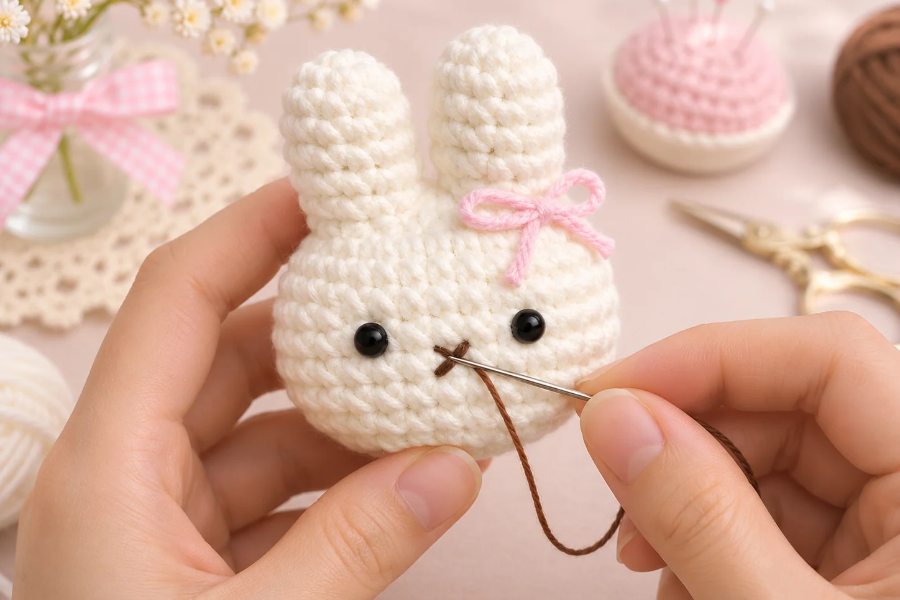
Use brown yarn and a darning needle to create the bunny’s face.
First, choose where you want the eyes to appear. Insert your needle from the side of the head and bring it out at the first eye position.
Make two or three small stitches in the same area to create an embroidered eye.
Repeat the process on the opposite side, making sure both eyes look balanced.
For the mouth, use small diagonal stitches to create a cute X-shaped design.
Hide the remaining yarn ends inside the bunny’s head for a clean finish.
Step 9: Add a Ribbon and Keychain Ring
For the finishing touch, tie a small decorative ribbon near the base of the bunny ears.
Next, securely attach a keychain ring or clip to the top of your crochet bunny.
If you don’t have a metal keychain ring, you can make a small yarn loop to hang your bunny from a bag or backpack.
Your handmade crochet bunny keychain is ready!
Tips for Making a Cute Crochet Bunny Keychain
- Use a stitch marker: This helps you keep accurate stitch counts.
- Maintain even tension: Consistent stitches create a neater amigurumi shape.
- Count every round: Accurate stitch counts are especially important when shaping the head.
- Use soft yarn: Choose a yarn that gives your bunny a neat, comfortable texture.
- Customize the colors: Try white, pastel pink, beige, or light brown for different bunny designs.
Frequently Asked Questions
Is this crochet bunny keychain beginner-friendly?
Yes! This project uses basic stitches, including single crochet, increases, decreases, and slip stitches. Some experience with a magic ring and amigurumi will be helpful.
Can I use different yarn colors?
Absolutely! You can create a white bunny, pink bunny, brown bunny, or any color combination you prefer.
What can I do with a crochet bunny keychain?
You can attach it to your keys, handbag, backpack, or pencil case. It also makes a cute handmade gift for birthdays, Easter, or other special occasions.
Final Thoughts
Making a crochet bunny keychain is a fun way to practice amigurumi while creating a charming handmade accessory. With two long ears, a rounded head, and an embroidered face, this little bunny is both adorable and customizable.
Try experimenting with different yarn colors and ribbons to make each bunny unique.

Leave a Reply