
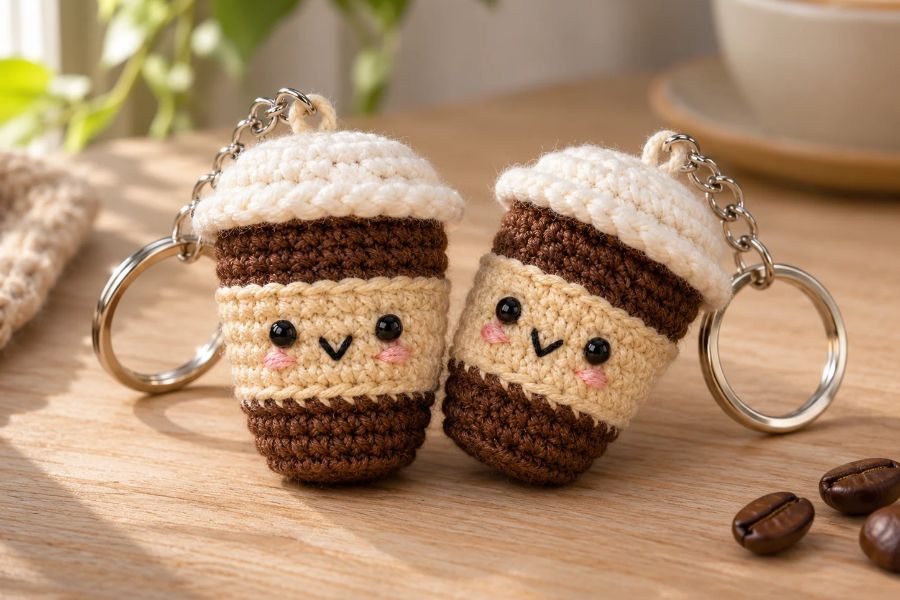
There is something deeply satisfying about miniature crafts. They take very little time to make, require minimal materials, and result in an accessory that is bursting with personality. If you have ever wanted to add a handmade touch to your everyday items, learning how to create a mini crochet coffee cup keychain is the ideal weekend project. Popularized by fiber artists like Cuddly Crochet Critters, this beginner-friendly amigurumi design is small enough to fit in the palm of your hand yet detailed enough to capture the charm of a real takeaway cafe latte.
Whether you plan to clip it onto your school backpack, dangle it from your car keys, or hand-craft a batch of them as heartfelt gifts and market stock for friends, this comprehensive guide will walk you through everything you need to know to bring your tiny coffee cup to life.
☕ Why This Project is Perfect for Beginners
Amigurumi—the Japanese art of knitting or crocheting small, stuffed yarn creatures and objects—can sometimes look intimidating due to complex shaping and sewing. However, this mini coffee cup pattern is specifically engineered to be approachable for absolute novices.
- Minimal Stitches Required: You only need to know a handful of basic crochet techniques, primarily working in a magic ring, single crochets, increases, and decreases.
- Instant Gratification: Because of its petite scale, the entire piece can be whipped up in a single sitting, making it an encouraging project if you are still building confidence with tension control.
- Stash Buster Extraordinaire: This pattern uses minimal yardage. You can easily raid your scrap yarn bin for leftover white, brown, and pastel strands instead of buying brand-new yarn balls.
🧵 Materials and Tools Checklist
Before diving into the stitches, gather your crafting supplies. Having the right tools on hand ensures a clean, professional-looking finished product.
- Yarn (Sport-Weight or DK Cotton recommended):
- Cup Body Color: White or cream to mimic a paper coffee cup.
- Sleeve / Detail Color: Brown, tan, pastel pink, or mint for the cardboard coffee sleeve or accent band.
- Liquid Color: Dark brown, chocolate, or espresso shade for the coffee top.
- Crochet Hook: A 2.5mm to 3.0mm hook works best. Using a smaller hook size than what is typically recommended for your yarn weight helps create tight, uniform stitches, ensuring your polyester stuffing won’t poke through the gaps.
- Stuffing: A small handful of hypoallergenic polyester fiberfill (poly-fill).
- Notions:
- A tapestry needle for weaving in ends.
- Sharp embroidery scissors.
- Stitch markers (essential for keeping track of your continuous rounds).
- Black and pink embroidery thread (optional, for stitching a kawaii face).
- Hardware: A metal jump ring and a secure keyring or lobster clasp to turn your plushie into a functional keychain.
🛠️ Step-by-Step Construction Process
Step 1: Crafting the Foundation & Base
Every great coffee starts from the bottom up. Begin with your cup body yarn (such as white or cream) and create a Magic Ring. Working in continuous spiral rounds (without joining with a slip stitch unless specified), you will steadily increase your stitch count over the first few rounds to flatten out the circular base. Once the base reaches the desired diameter, you will work into the back loops only for a single round to create a sharp structural edge, allowing your cup to stand upright instead of curling inward.
Step 2: Building the Cup Walls and Sleeve
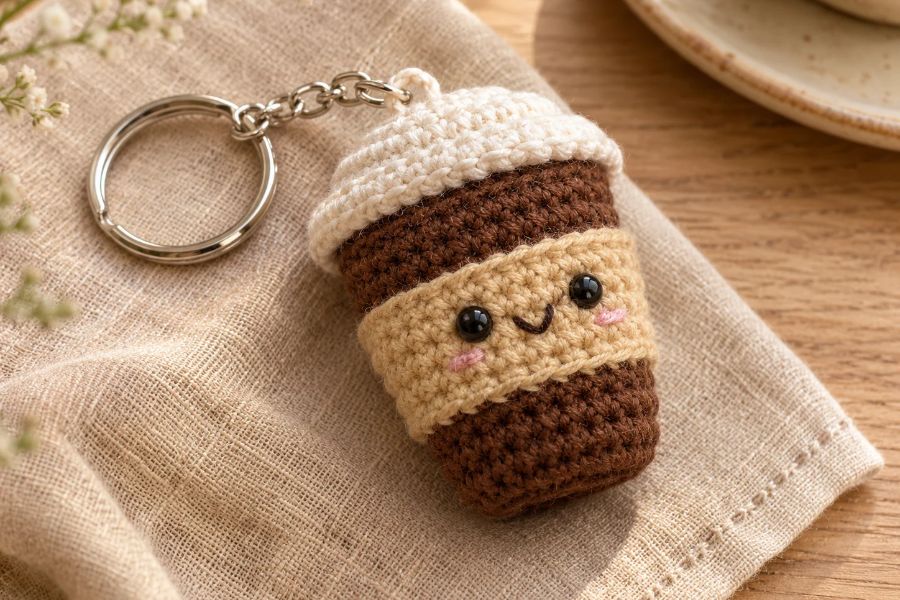
Continue working steady rounds of single crochet to build up the height of the cup. Around the mid-point of the body, you can switch yarns to introduce your sleeve color. This creates the visual illusion of a cardboard coffee sleeve wrapped around the middle of a hot cup. If your pattern incorporates color changes, keep your floats neat inside the work. Maintain a consistent, firm tension to give the mini cup rigid structure.
Step 3: Pouring the “Coffee” Liquid
To cap off your cup, you will work a flat circular disc using dark brown yarn. This piece matches the final stitch count of the cup opening. Before completely sealing the top, stuff the interior firmly with polyester fiberfill. Pack the corners tightly so the cup holds a plump, pillowy shape, but take care not to over-stuff to the point where the stitches warp or stretch open.
Step 4: Adding Kawaii Details and Face
If you love the “kawaii” aesthetic, giving your coffee cup a little personality transforms it from a simple shape into an adorable character. Using a short length of black embroidery thread, stitch a tiny “U” shaped mouth centered between rows on the lower half of the cup. Add two french knots or short straight stitches for sleepy or cheerful eyes, and accent the cheeks with a tiny dab of pink thread or soft blush.
Step 5: Securing the Keychain Hardware
Safety and durability are crucial for anything hanging off a set of keys. Securely fasten a metal jump ring through the secure center stitches at the top crown of your cup or weave your yarn tail tightly through the topmost loops, cinching it closed. Attach your keyring or clasp, ensuring all loose yarn ends are neatly tucked away inside the body.
💡 Expert Tips for Professional Results
- Never Skip the Stitch Marker: Because amigurumi is worked in continuous spirals rather than joined rows, it is remarkably easy to lose track of where your rounds begin and end. Pop a stitch marker into the very first stitch of every round.
- Embrace Tight Tension: Loose stitches lead to gaps where white fiberfill stuffing will peek through. If your hands naturally crochet loosely, try dropping down half a hook size.
- Personalize Your Cup: Don’t be afraid to experiment! You can add a tiny crocheted straw poking out of the top for an iced coffee variant, or swap the sleeve colors to match your favorite seasonal coffee shop cup designs.

Leave a Reply